Introduction
Automatic1111 Webui is a powerful tool for generating images using Stable Diffusion models. With ControlNet, a neural network structure for controlling diffusion models by adding additional constraints, you can better control what you generate with Stable Diffusion. In this post, we’ll show you how to install ControlNet for use in Automatic1111 Webui.
Step 1: Install OpenCV Library
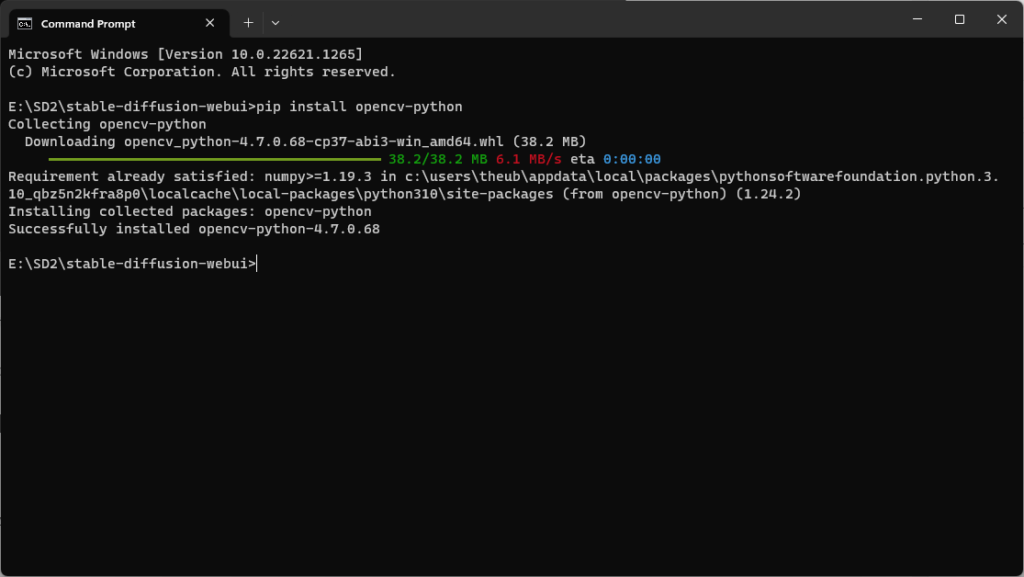
To install ControlNet, you’ll need to first install the cv2 library via pip install opencv-python. This library is required for the ControlNet extension to work properly.
To make sure that you have the cv2 library installed, you simply open a command prompt and run the above command.
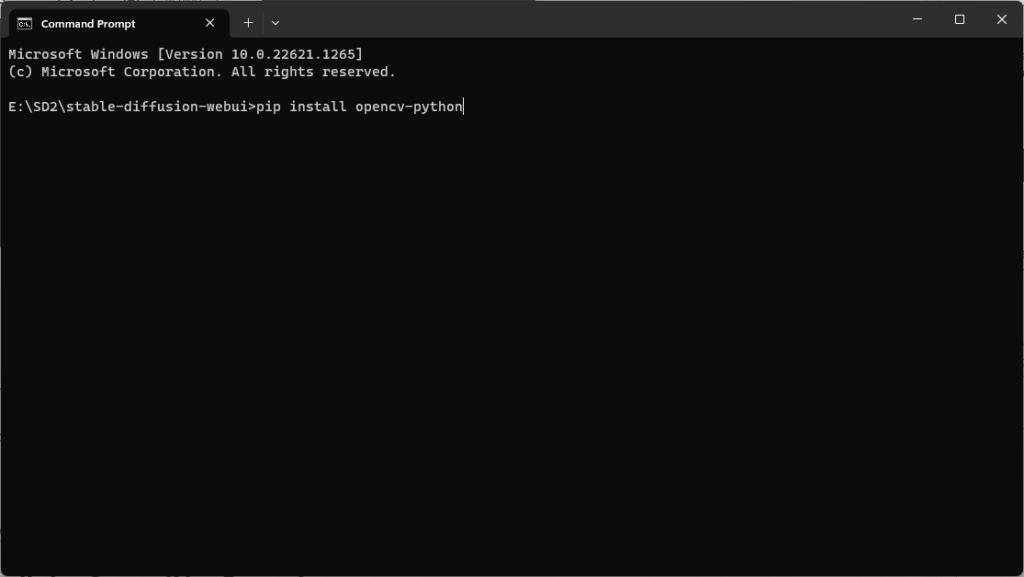
Step 1: Open a command prompt. On Windows, the easiest way to do this is to open the folder you have Automatic1111 installed in, right-click anywhere in the folder, then select Open In Terminal. If you are on a Mac or Linux you would open a terminal as you normally would.

Step 2: At the command prompt, type:
pip install opencv-python
And press enter.
Step 3: Wait for pip to install the library.
Step 2: Install the ControlNet Extension
Next, you’ll need to install the ControlNet extension into Automatic1111 Webui.
Step 1: Open your Automatic1111 WebUI.
Step 2: Click on the extensions tab

Step 3: Select the “Install from URL” tab.

Step 4: Paste the URL for the extension’s git repository into the box with the same label. That URL is:
https://github.com/Mikubill/sd-webui-controlnet.git
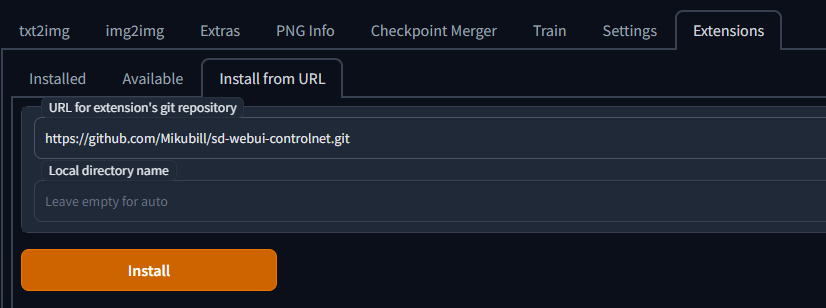
Step 5: Press install.
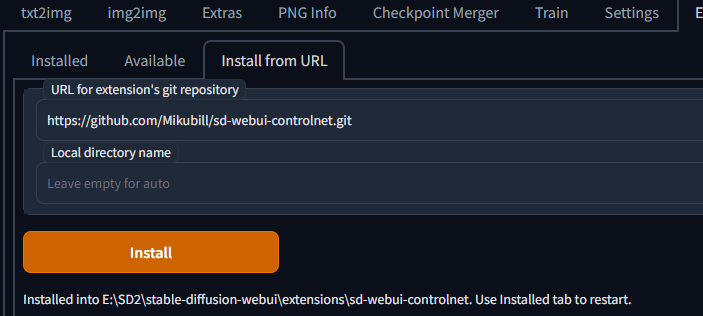
Step 6: Once the extension is installed click on the Installed tab.

Step 7: (optional) Click Check for updates
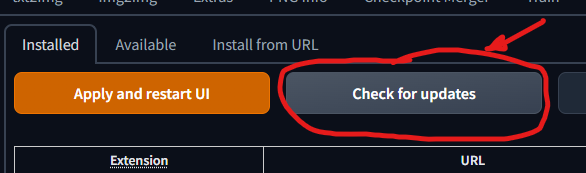
Step 8: Click Apply and restart UI.
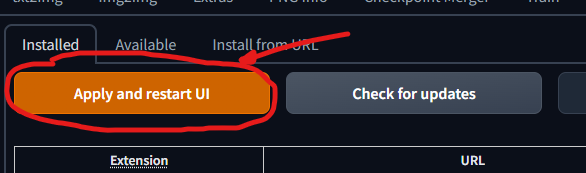
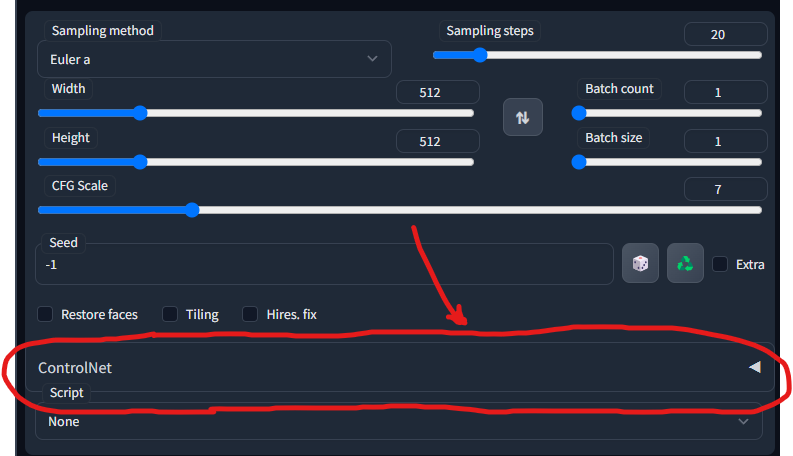
If all goes well, you will now see ControlNet at the bottom of your txt2img or img2img tabs.
Step 3: Download ControlNet Models
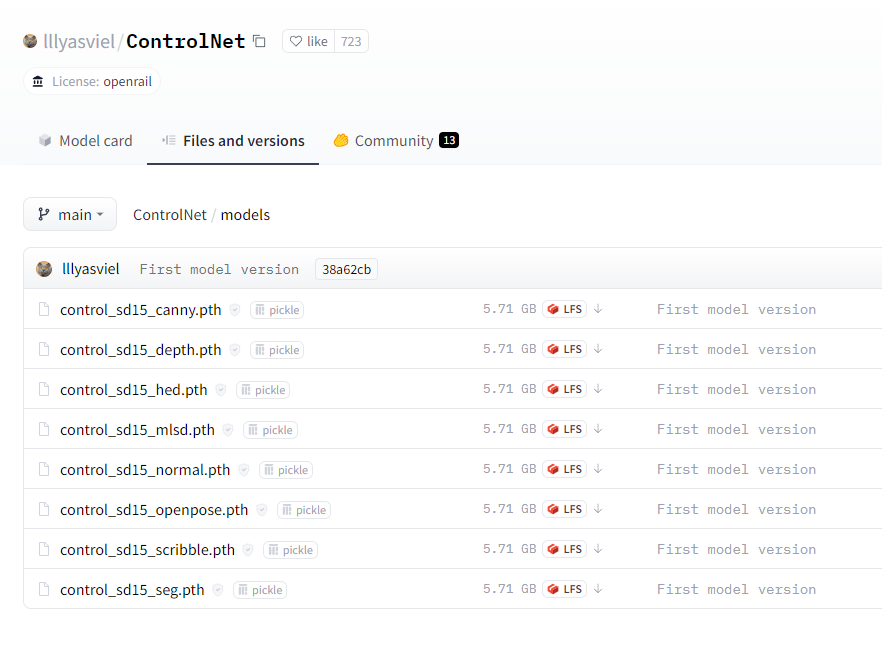
After installing the ControlNet extension, you’ll need to download the ControlNet models to use with Stable Diffusion. The original models are available at https://huggingface.co/lllyasviel/ControlNet/tree/main/models, but they are roughly 6GB each for a total of around 45GB.
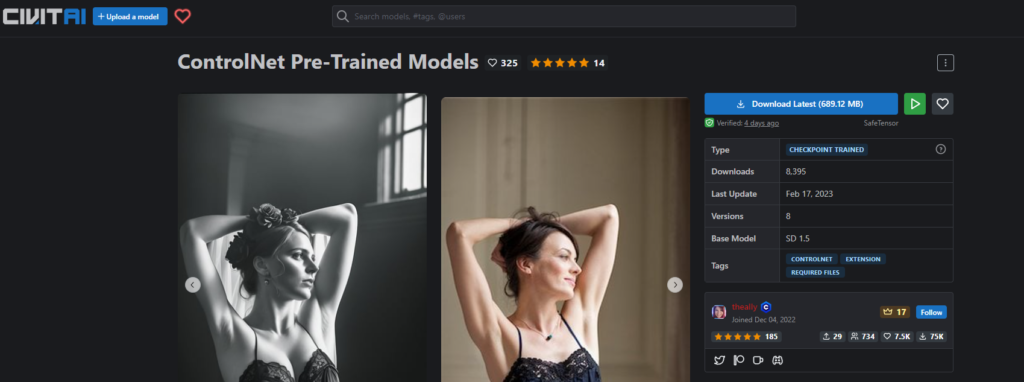
Fortunately, a user named theally has created pre-trained models that are less than 1GB each, which can be found at https://civitai.com/models/9251/controlnet-pre-trained-models.

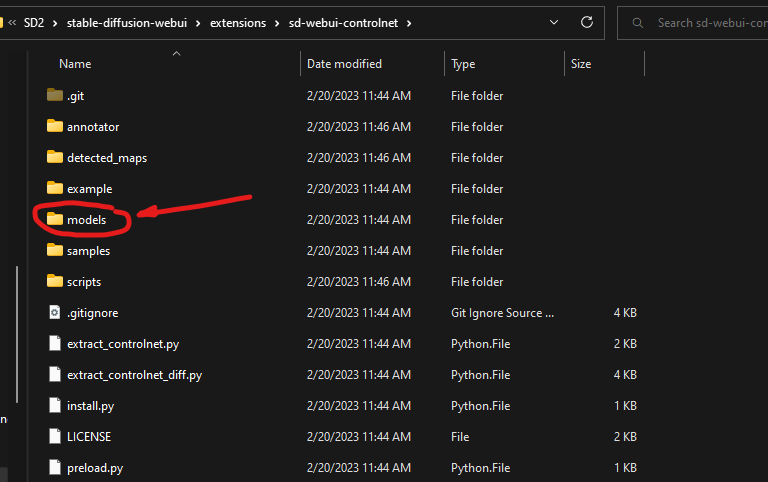
Both work just fine. You will need at least one model, but I strongly suggest downloading all 8. You will need to place these models in the extensions\sd-webui-controlnet\models folder.
Once you have your models, you can click the refresh button next to the models drop down in the ControlNet section to reload your models list. If you did it right, you should now see your models on the dropdown list.

Step 4: Fixing Issues with Gradio
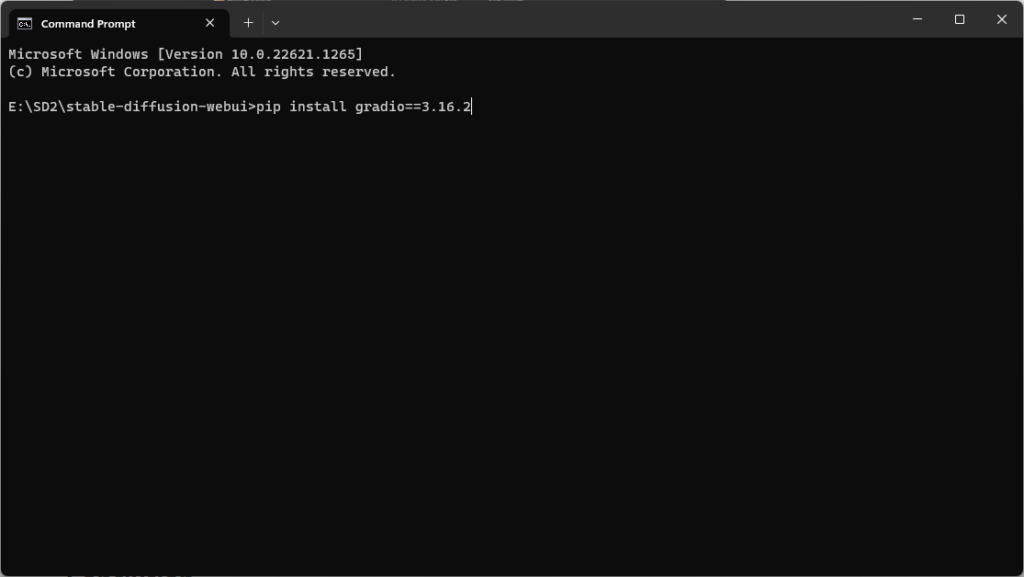
Some users may experience issues with Gradio when using ControlNet. If this happens, you can try running the command pip install gradio==3.16.2 from a command prompt to fix the issue.
Step 1: Open a command prompt.
Step 2: Run the command:
pip install gradio==3.16.2
Step 3: Wait for pip to install that version of Gradio.
This usually fixes most Gradio errors that crop up with older versions of Gradio when trying to use ControlNet.
Conclusion
With ControlNet, you can take control of your Stable Diffusion models and generate more specific and precise images. By following the steps outlined in this post, you can easily install ControlNet for use in Automatic1111 Webui and start generating even better images.